Creating a pre and post inspection document helps the property management have a record of the condition of the amenity before and after its use.
The first step will be to create the inspection document(s) in the setup page
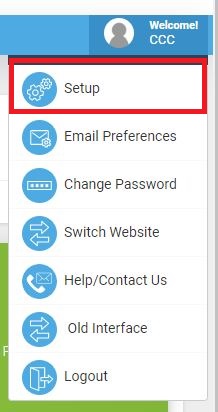
1. Click on the welcome button, then click on setup
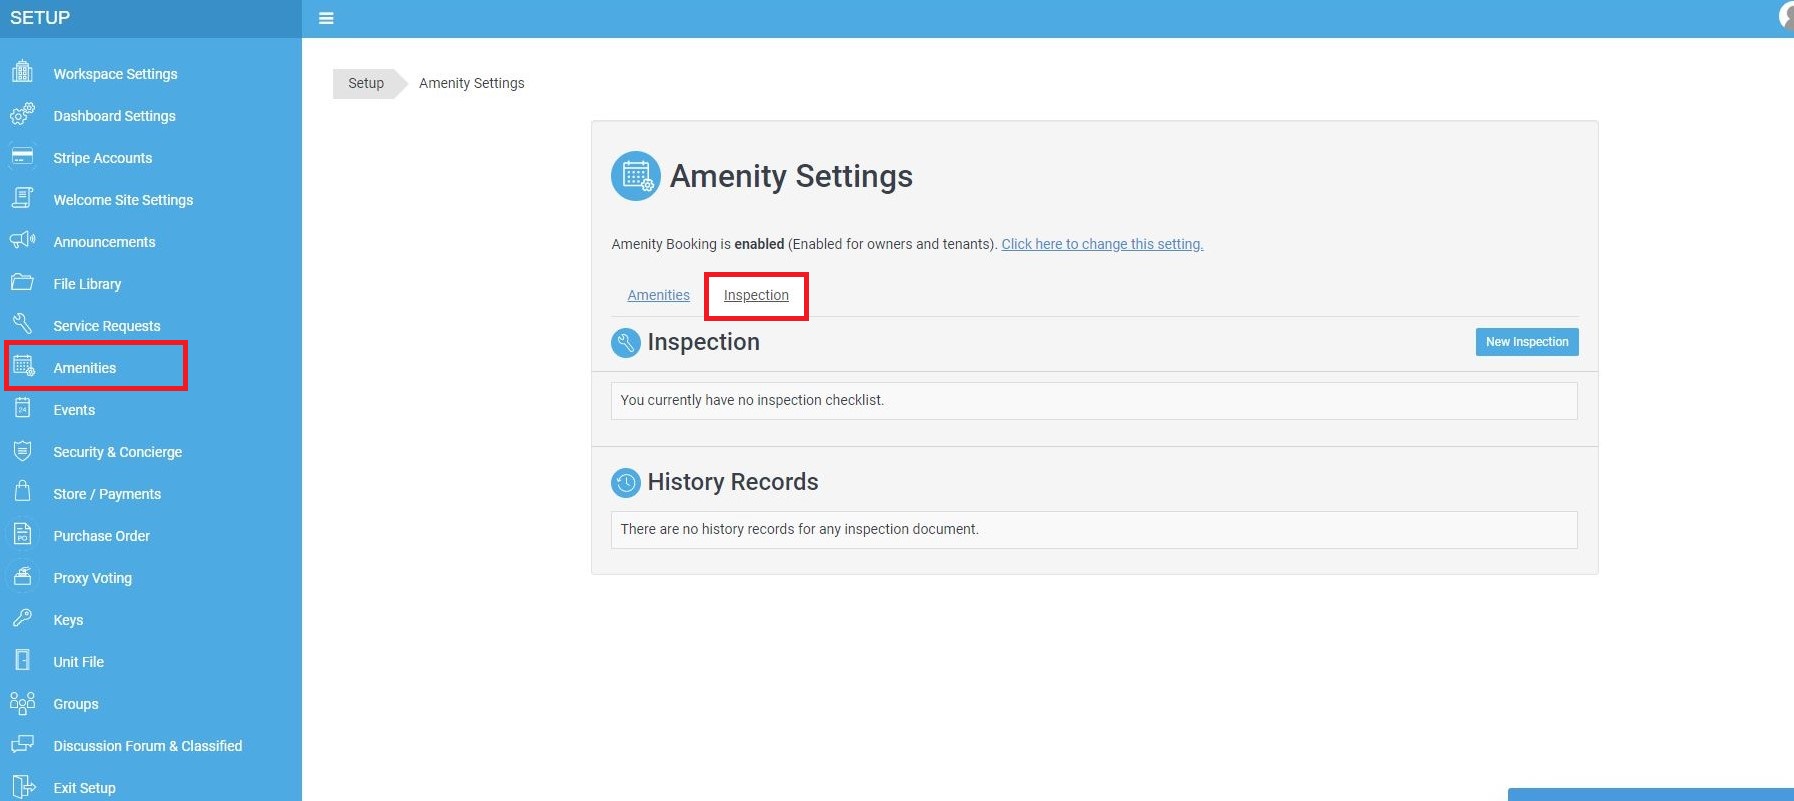
2. Click on Amenities on the left hand menu, then Click on Inspection on the right side of the screen
3. Click on the New Inspection button to create an inspection document.

4. Fill out the Form below to create your Pre or Post Inspection documents. If you require residents to sign off ensure the Yes option is selected.
5. Enter your inspection steps. Click on 'Add Step' to include additional steps. Steps can be rearranged using the arrows on the left side of the steps.
Up arrows to move a step higher, down arrows to move a step lower.
Once complete, click on "Save".
6. The next step is to attach the inspection document to the respective amenity. Click on the Amenities tab, then click on the edit button of the amenity you would like to attach the inspection document to.
7. Click on the subtitle "Rules".
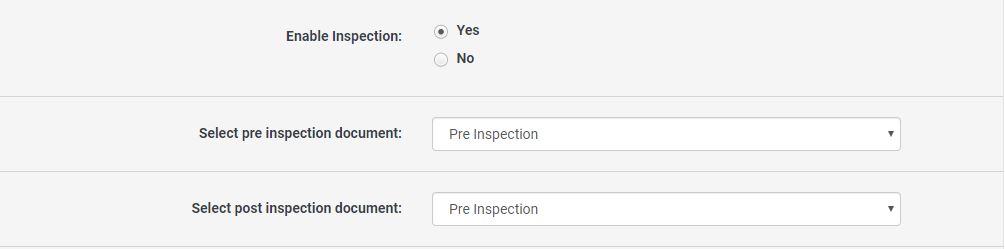
8. Scroll down to Enable inspection and select Yes. From the drop down for select pre/post inspection document, select the appropriate inspection document then click Save
Once a booking with an inspection document is approved, the booking will be shown on the security and concierge app to conduct the pre and post inspection steps.